Twitch channel design, header template. Twitch channel design twitch profile image
You want to choose Twitch banner dimensions that are large enough for you to give your audience crucial information. At the same time, you don’t want a banner that dominates the screen obnoxiously. Find a happy median so your channel looks professional.Identify your theme
Adobe offers several Twitch background themes that can help you stand out from the crowd. Choose one that complements your channel.Choose an image
With Adobe Spark, you can access thousands of free images online. Of course, you can also import a Twitch offline image that you made yourself.Customize your typography
Twitch banner templates on Adobe will let you browse hundreds of typeface options. Find a script that brings your channel to life. Then, you just paste your content into the text box.Download and upload your Twitch banner
Once you make your Twitch Banner with Spark Post, you can download it and place it on your account. Now, you have a banner that offers a custom look and personalized information.How to Customize Your Twitch Panels
Watch the video or read the instructions below.
- Use the input controls to design your panel.
- Right click the panel and select “Save Image As...”
- That's it! You’re ready to upload them to Twitch!
Use the app inputs to make the panel look exactly the way you’d like it to! I recommend that you start with the panel with the longest panel text. So if you’re making two panels with the text “Subscribers”, “Donate”, and “About Me”, you should start with the “Subscribers” panel, as it takes up the most horizontal space.
You want to do this so that your font sizes and text alignment are all the same. However, if you don’t want to have the same font sizes, that’s fine too!
Options Available
The follow options are currently available for this app:
- Left Side Color This input is done through a color picker. Changing this color will change the background color of the box on the left side. This is the box that contains the icon. By default it is set at #23b85e – you can use the pallette, HSL Slider, or color input to select your color.
- Right Side Color – This input is done through a color picker. Changing this color will change the background color of the box on the right side. This is the box that contains your panel text. By default it is set at #101220 – you can use the pallette, HSL Slider, or color input to select your color.
- Text Color This input is done through a color picker. Changing this color will change the text color of your panel text. By default it is set at #ffffff – you can use the pallette, HSL Slider, or color input to select your color.
- Panel Text – This input field controls the text to be included on your panel. The text will be updated as you type.
- Icon – The icon dropdown will change the image displayed on your stream panel. Simply choose any of the pre-made icons and it will be updated on your panel automatically.
- Text Size Use the text size slider to select how big you would like your panel text.
- Text Vertical Align – The text vertical align slider can be used to move your text along the Y-axis. This option is useful if you’d like to move your text towards the top or bottom of the panel. On some browsers the text will not be automatically aligned to the middle.
- Add Padding For some Twitch panels you will like “padding” or empty space on the bottom of your panels to add space between your image and text that you may be putting underneath it. Selecting Yes will show the checkerboard, which indicates that there will be empty space added underneath the panel. No will remove the padding and the image will include no empty space on the bottom.
- Font Family Allows you to manually set a font of your choosing. Simply type in the name of any font that you have installed on your local system.
Should I add padding?
The easiest way to make your panels look great, is to “Yes” for padding if the image will be a link. If the image will not contain a link, then select “No” for padding.
An example of your images with and without padding, as links and non-links.
Please let me know if you have any problems with this app!
If you’re experiencing any issues, please let me know in the comments below. It will be much easier for me to add icons to this system, versus my previous post.
Updates
- Added support for mobile scrolling on webkit devices.
- Added text box for font input. This allows users to enter any font they have installed on their system with these panels.
- Added support to directly input color code into the color picker.
- (03/08/16) – Added Game Wisp, Crown, Snapchat icons.
- (03/13/16) – Added Plays.TV, Tumblr, DeviantArt, Keyboard, Mouse, Battle.Net icons.
- (03/25/16) – Added Playstation, Xbox, Pokemon, PayPal, Extra Life, UPlay, and Thumbs up icons.
- (07/17/16) – Added download button and file name input.
Let's start setting up your profile.
To proceed to settings, on the main page, click on your nickname and select “ Settings”.
Profile
On the page " Profile» you can change the case of your nickname in the “ field Display Name”, email, avatar and add some information “ About Me”.


Turbo access
On this page you can purchase “ Turbo access” to the Twitch portal for $9, receiving some privileges, such as turning off advertising, additional emoticons, and more.

Channel and videos
Here you can customize the appearance of your channel. Detailed channel design can be seen in the “For Twitch Streamers” section.
Security and privacy
In the " Security and privacy"You can change your password, configure " Two-factor authentication" And so on. I don’t think it’s worth describing everything in detail, since this section has been completely translated into Russian :)


Notifications
Don't underestimate the "tab" Notifications". Here you can set up SMS and email notifications about the broadcast of your favorite streamers, when someone appoints you as a moderator on a channel, and so on. Please take the time to configure this tab correctly.


Connections
A very useful and convenient feature. Provides the ability to connect accounts from other social networks. networks to your twitch account. For example, when you connect to Twitter, tweets will be automatically created about the start of your broadcast. 
Subscriptions
In the " Subscription» displays all your paid subscriptions and privileges provided. You can also cancel your subscription, unsubscribe from channels (with a refund of payment) and monitor the time remaining until the end of a particular “subscribe”.

If you have any questions about setting up your Twitch account, ask in the comments. We’ll help you figure it out :)
Twitch is a huge server for video game streamers. In short, streamers are people who broadcast their playthroughs of the game in real time with comments and discussions. The site has the option of a one-time broadcast, but many gamers prefer to create their own channel for constant streaming. Of course, you don’t have to bother yourself with creative channel design, but you’re unlikely to gain a large audience.
The design of a channel on Twitch.tv must have several elements for successful development:
- creatively designed banner;
- competent description;
- a beautiful screensaver when you are offline;
- The banner on the player looks very high quality, indicating the time of your next broadcast.
It is worth remembering that the channel design should be made in the style of the game you are streaming. Often, it is by the design of the Twitch channel that the user understands what game is being broadcast and whether he should stay to watch it.
Secrets to successfully creating a channel on Twitch
Any Twitch user can design their own channel. True, in order for the creation of a design to be high-quality, you need to know several rules that the Twitch website has established:
- banners for the channel must be of a certain size;
- the picture that is displayed on the player in offline mode also has a certain size and weight;
- In order to add hyperlinks to the description, as well as format the text, you must use certain programming languages;
- sometimes a special layout is needed for a Twitch channel
Therefore, if you just want to play and stream on Twitch, and you don’t want to deal with the intricacies of design, you should contact a specialist who can professionally create channel design.
Where to order inexpensive channel design services on Twitch
A professional will be able to create a completely new channel design for you, as well as add something to the old one or completely change it. Prices for such services vary, but the cost is still low. Although you can always get services at a lower price.
On the YouDo website you can order the design and layout of your channel inexpensively. To do this, you just need to fill out an application where you describe the essence of your order and indicate the price acceptable to you. If registered performers are interested in your application, they will contact you to discuss details.
You can look through the list of specialists who provide services for creating Twitch.tv channels and choose someone who can make or change your channel.
All performers are verified upon registration, so your order is sure to be completed professionally and creatively.
Twitch channel design, header template.
I won’t explain what Twitch is, if you came to this article, then you know this, so let’s get straight to the point.
Step 1. Create a header.
From the moment you create your channel, your header will look like this:

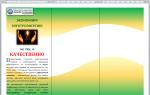
Agree, it’s not a very interesting design. Actually, in order to replace it, we first need to draw our own cover. The recommended header size is 1200x300 and the file size should not exceed 3 MB. I have already made a ready-made template of the required size, it looks like this:


Ready-made Twitch template - save in Photoshop
Step 2. Replace the header on Twitch.
We already have the hat, all that remains is to replace it on the Twitch channel itself. To do this, go to your channel and click on our nickname. 
The current Twich header will appear. We point the mouse at it, we will be asked to change the profile banner, also known as the header. We click anywhere on the cover and we will be prompted to upload a new image. We drag our header image into the browser, or select it from the desired folder.

Click the “Finish” button

As a result, we get the following header:

You can change the cover as many times as you like and at any time.